Sunday, April 23, 2017

Parts of a Newspaper


In a newspaper, there are different components that need to be in there in order to be a good one.

1. Nameplate: It is the banner in front of the newspaper that identifies the publication. It usually contain the name of the newsletter, it can possibly contain a graphic, logo or more.

Image result for nameplate new york times


2. Body: Its the part that is excluding the subheading, headline and graphics. It is mostly the article that makes up the newsletter.
Image result for body of a newspaper article
3. Table of Content: It briefly states the articles that is in the newsletter and special sections. It will also display the pages of those sections.
4. Masthead: it is usually in the second page of the newsletter and it lists the publishers and other pertinent data. it can include addresses, staff names and more
Image result for masthead newspaper
5. Headlines: There are different headlines that are in a newsletter. They are :
  • Headline
  • Kicker
  • Deck
  • Subhead
  • Running Head
  • Continuation Head
Image result for headline in a newspaper
6. Page Number: the number of the page in the newsletter. It can be places in the top

7. Byline: its a short phrase or paragraph that indicates the name of the author of an article in a newsletter.

Image result for byline newspaper
8. Pull Quote: its a quote in the article that is suppose to attract the readers. It is usually in a larger font.
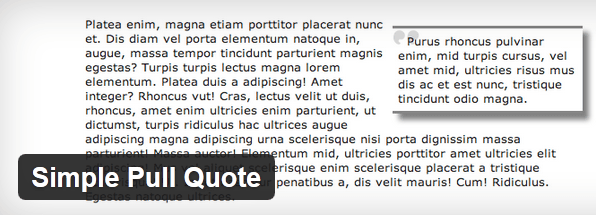
Image result for pull quote

These are the most important parts to a newsletter


Monday, April 3, 2017

Yearbook Presentation

As part of the yearbook project, we have to prepare a presentation. In my group, we had to discuss on our topic, our roles, our disadvantages and advantages. Also in the presentation the class is suppose to give us advice to fix the problem and/or give reviews on the overall on the project. There are parts of a yearbook that we are suppose to use in our yearbook. One is the gutter, which is the fold in a spread. When printing and folding, there should be enough space so when putting the yearbook together wont be messed up. For example, one side of the spread has more empty space than the other side of the spread. Another vocabulary word that I have learned is byline. A byline is where you place the person that get the photo or information. In our project, we were not suppose to use images online, but if we were to use them, the credit of the images should be small and close to the image. Usually there would be a caption that goes with the byline, so there is little info on the image.

So in our presentation, we basically state the most important thing in our projects and our troubles. When our presentation ended, we have some reviews from other groups. One said in order to solve our time management issue, we have to create a schedule in order to know what to do. Another opinion was to do a meeting every 20 minutes. Some of the ideas my classmates shared I agree with, but some I didn't. So then I listened to two other group's presentation and I personally think that their presentation was more elaborate than ours. So I heard some discuss on the lessons that Mrs. Ramirez taught us in a yearbook. Overall, this is what we did on 4-3-17, our yearbook presentation.

Thursday, March 30, 2017

Lab #11

In this lab, we were shown how to put an image on the letters of a word and apply it for our own yearbook. To do this, first you have to open a new document, which a letter sized, vertical document. Then you have to use the type tool to create a text box and write the word "Sports". Then you have to make the text have a bold font and the size of 160px. Next you convert the text to an outline by first selecting the text frame, then Type, then Create Outlines. This will create an outline to the word "Sports" and it can be used to put a texture on the word. Next you insert an image by going to File, then Place. You choose an image that you want the word to be filled, but for this lab it have to be the sport image provided. Even after putting the image, it isn't proportional to the word, so what you do next is to make the image proportionally. To do that, you first go to Objects, then Filling, then Fill Frame Proportionally. After all of it is done, it should look like this:

Then after that is done, we had to think on how to apply this into our yearbook. My group was think that since there is a gigantic ITHS in the back cover, it should have the image filling. We think that the image should be the group picture of us in the CTE Expo, since it's all of us in the picture. We were also think of using this technique in the "Funny Images and Stories" Section where the title would be a collaboration of memes. This lab can definitely help our yearbook become perfect for the audiences to read and look back at 2016-2017 Visual Design class. This technique would help me as a future Web Designer by creating "eye-popping" covers that will attract consumers and will let them read the document, book, or anything else.

Wednesday, March 22, 2017

LOFT STEM Symposium Trip


In this trip, I went to Lehman College to a Symposium that is all about the STEM Program. STEM means Science, Technology, Engineering and Mathematic. This was run by the U.S Army to teach us about leadership. In the beginning of the Symposium, we were put into tables, which were like groups, and we had to do activities. One example of an activity was that there was a scenario (there were 3). each table have at least one of the scenario and have to answer some of the questions that were based off on leadership. In my scenario, my group had to decide whether to cheat in a robotics fair or not. I would not cheat, because based on the scenario, I would feel guilty for the other teams that should of deserve the money for their charity.  So we all decided not to cheat on the robotics fair. Then later on there were clips that showed how leadership wasn't established. Right after that the food station open and went straight for the food!
Right after the food, I went to see the robots that were displayed in an area. I could see that others were trying out the robots and I wanted to try, but there wasn't enough time and got out of the line. Then there were guests speakers that were talking about their experience in High School and the programs that they did. They even talked about their difficulties and advices for us for the future. I have learned one or two things during the interview. right after that was basically the end of the trip. After the raffle we went back to ITHS. I did learned a few things during this trip. One thing that I have learned is to take the chance to go to a program that will help you before its too late. Another thing that I've learned is that being a leader would require full cooperation with your teammates.

Monday, March 20, 2017

Work Based Learning # 5

In this WBL workshop, we were learning how to create a resume for an internship that will be used in the future. So the first thing that a resume should have is your name, address, cellular phone number and your PROFESSIONAL email. Do not create a email that doesn't include your name. A professional email should only contain your first and last name. In the bottom of your contact information should be your summary. It should include any information about you like being trustworthy or good in teams. This will make the employers learn more about you and what are you best at. Then the resume should include a skill section. the skills sections should include any skills that you have done and know for a couple of months. For example, in Visual Design, I have skills on working on Photoshop, InDesign etc. These skills need to be relevant to the job that you are applying to. The job or internship you plan to apply for probably want a certain skill to get the job.

The next thing that a resume should include is volunteer work or any service experience. This can be anything that you did to help the community by helping the elderly people or cleaning the park, but it must be certified by someone. if you just simply state that you did community work and its not certified, the employer might think that you are lying and it can cost you the JOB. Then you should include in the resume your education and/or training. It should have your education, your expected graduation year and any other certification you got in your life. You might also want to include achievements that you have gotten. Finally you go check for any grammatical error, because you want to make the least amount of errors in your resume. this is all of the component to create a resume and it will definitely be asked for in an interview

Sunday, March 19, 2017

Lab #10

In this lab, we are suppose to learn how to print our yearbook project by creating a small book. The requirement for the book is 3 page spread, a cover and a back cover. Each spread must include your name and a shape. The shape and name are suppose to be in the middle of the spread. Before I did that, I had to number each page. I am not allowed to number the page manually, but must do it in A-Master. To do that you must click on A-Master in the right of the Layers tab. Then one spread would show up. Then you create 2 text boxes to where the number of the pages would be. I created 2 identical ones to make things look neater. After that you go use the type tool, then go to the Type tab, Special Characters, Markers and then Current Page Number. this will create an A on the left side of the text box. on the right text box, the alignment should be in the Right Alignment. After I did all of the steps, I adjust the font size of the numbers.

Once I did all of that I created the shapes and put them in the middle of the spread. once everything in the requirement is done, I began to adjust the settings for the printer. First it should be short edge binding, not long edge binding. Also it should be printing in landscape. At the end, it should be printing like a book. I also have to fold the paper perfectly or else the image wont fit good. This lab is suppose to help us learn about printing a booklet if we had to create one. This skill will definitely help me in the future by creating small booklet for the job I could be working for. These skills can be implemented in Web Design, because if you create a n online booklet, you would want to print a physical copy of one too.

Wednesday, March 1, 2017

Project #5 Brochure PART 2

To continue with our project, we now have to animate the brochure if the brochure were to be distributed online. In order to make an animation, you fist have to select the box that you want to animate. Next you click on Windows in the Menu bar, Interface and Animations. There are a lot of transitions to choose from. For the image on the third page I chose a shaking animation and it is in a loop to probably attract the readers and to show this subject is important. Then I chose a fade in transition for the first and sixth image. In the second image, there is also a fade in animation and in the 4th and 5th page, there is a dancing-like motion. the reason why I did that was to attract the readers. Then I added a hyperlink to my name so if anyone want to know about me, it goes to my blog and people can read on it.
Now that I was done with the animations on the picture, I wanted to add the page transition in the brochure. To do that you go to Windows, then Interface and then Page Transition. There were many different page transitions to choose from, but I decided to choose the page flip, because it looks cool. After I applied it, I would have to export the file into two different files. The two different file are SFW and PDF (Interactive). These skills can be use to create brochure online for companies for people online. It is also helpful in attracting consumer. These skills can help me as a Web Designer by creating projects that people could interact with.